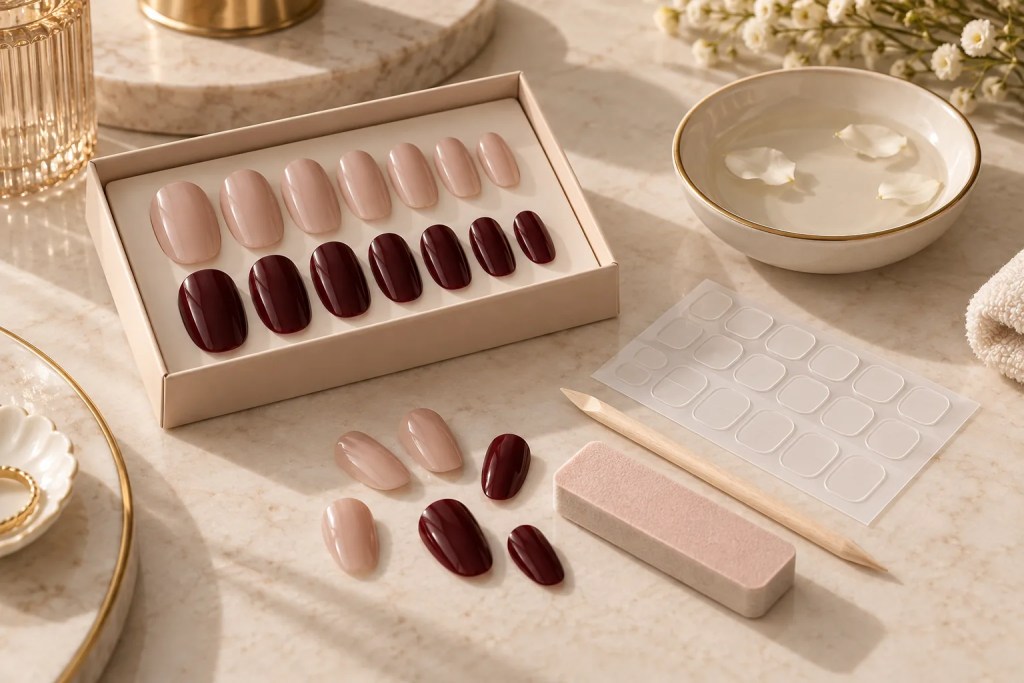
Press-on nails can provide a temporary manicure, but fit, adhesive choice and patient removal matter more than forcing the longest possible wear. Choose a set that sits within the sidewalls without pressure, and never pry a bonded nail away from the natural nail.
Choose shape and length for real life
Long sculpted nails may suit a short event but interfere with typing, contact lenses, sport or childcare. Begin shorter if you are new to press-ons. A rounded or soft-square edge is less likely to catch than a very sharp point.
Seasonal coverage may make elaborate nail art look inviting, including Halloween designs. Treat it as inspiration rather than a requirement. A plain wine, brown or neutral set can use the same preparation and removal method.
Size every nail before adhesive
Lay out all ten sizes. The artificial nail should cover the natural nail from side to side without pressing into skin. If you are between sizes, choose the slightly larger option and gently file the sides of the press-on—never the skin—to fit.
Prepare lightly
- Wash and dry hands thoroughly.
- Remove old polish and visible oil.
- Gently push back only loose cuticle from the nail plate.
- Use a very light buffer only if the kit directs it.
- Wipe away dust and allow nails to dry.
Aggressive buffing thins the surface and does not guarantee safe wear. Do not apply over painful, inflamed, split or discoloured nails. If a nail concern persists, seek professional advice before covering it.
Tabs or glue?
Adhesive tabs are usually easier to remove and suit brief wear, though hold varies. Nail glue can last longer but increases the importance of careful amount and removal. Use only adhesive intended for nails, keep it off skin and follow the kit directions.
Press each nail from the cuticle area toward the free edge, leaving a tiny gap from the skin. Hold for the instructed time. Avoid water immediately afterwards if the directions say to do so.
Remove with patience
Follow the specific adhesive instructions. Warm soapy water and oil may help loosen some tab systems; glue systems may require a dedicated remover or acetone. Work gradually from an edge only when it releases. If it resists, soak longer rather than lifting or sliding a hard tool under the nail.
The American Academy of Dermatology warns that artificial nails and their removal can leave natural nails thin, brittle and dry. Give nails a break if they feel tender or damaged, and moisturise hands, nails and cuticles.
Keep the set hygienic
Do not share used nails or tools. Discard a press-on that trapped moisture or has residue you cannot clean. If a nail lifts, remove it properly rather than adding glue into a gap where water and debris may be present.
Store unused sizes dry in their original tray and keep adhesive capped. Carry a spare tab rather than a loose glue bottle when travelling. After removal, inspect the natural nail in good light. Tenderness, colour change, separation or persistent redness is a reason to pause cosmetic application and seek appropriate advice.
FAQs
Can I reuse press-on nails?
Some sets are designed for reuse, especially with tabs. Follow the manufacturer’s guidance and do not reuse damaged or unhygienic pieces.
Why do press-ons pop off?
Common reasons include poor sizing, oily nail plates, too much or too little adhesive, water exposure or using a length that catches frequently.
Should I cover a green or painful nail?
No. Remove cosmetic covering and seek qualified care. Browse the Etoraa beauty collection for future options only after the nail is healthy.
Sources
- Vogue — Spider nails for Halloween 2026 — 2026-10-20; accessed 21 October 2026.
- AAD — Artificial nails: reducing nail damage — not displayed; accessed 21 October 2026.